
How to Pack a Kayak for a Safer Day on Water
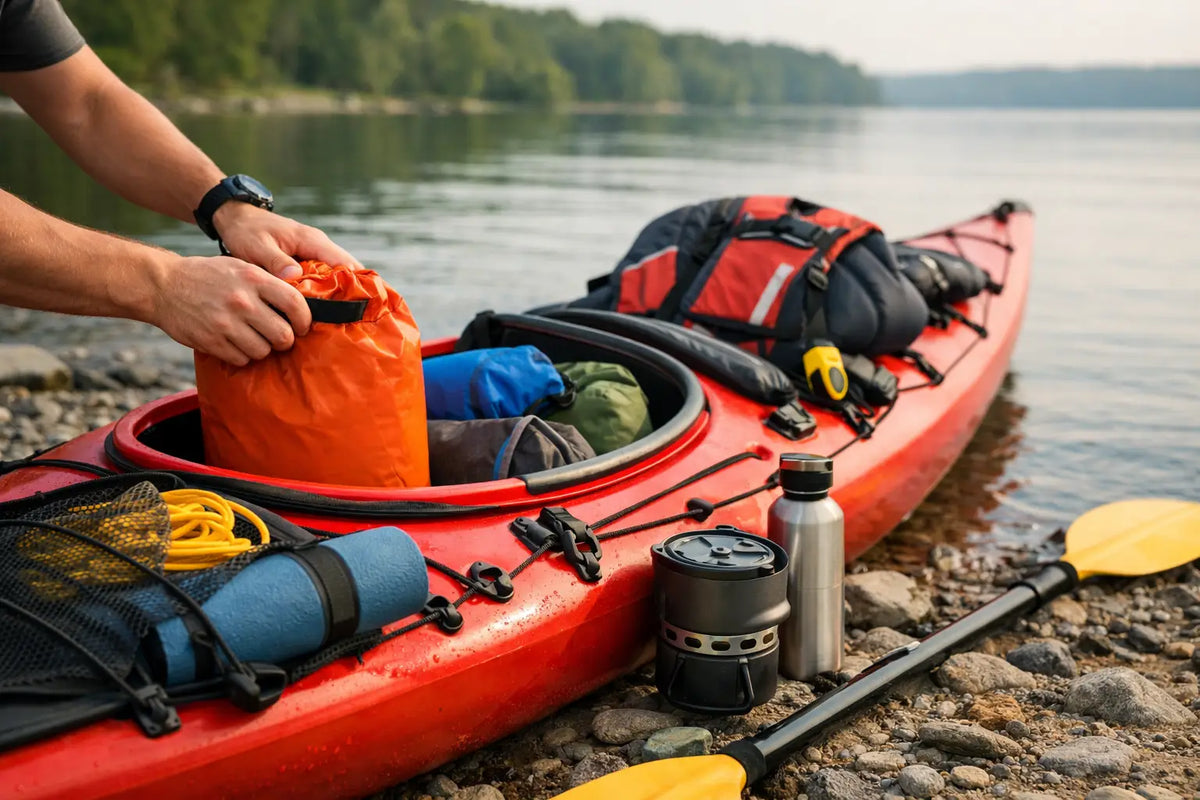
A kayak can feel stable at the launch and surprisingly awkward 20 minutes later. The usual cause is not the boat - it is the load. Learning how to pack a kayak means putting weight where the hull can carry it, protecting essentials from water, and keeping safety gear within reach when conditions change.
A well-packed kayak is easier to paddle, turn, carry, and recover after a capsize. It also keeps a casual lake outing from becoming a search through wet bags for sunscreen, a phone, or a first-aid kit. Whether you are heading out for a few hours, fishing a quiet shoreline, or planning an overnight route, pack for the trip you are actually taking.
Start With the Kayak’s Capacity and Storage
Before loading gear, check the kayak’s weight capacity. This number includes the paddler, PFD, paddle, seat, cooler, fishing gear, water, and every dry bag. Staying under the listed limit is not just about keeping water out of the cockpit. An overloaded kayak rides lower, responds slowly, and becomes less predictable in waves or boat wake.
Touring and sea kayaks usually have sealed bow and stern hatches. Recreational sit-inside kayaks may have one hatch or none, while sit-on-top models often use tank wells, bungee rigging, and accessory mounting points. Pack around the storage your boat has instead of trying to force bulky camping equipment through a small round hatch.
If your kayak does not have sealed bulkheads, do not treat its hull as dry storage. Water can enter through hatch covers, loose fittings, or an unexpected flip. Use dry bags inside open storage areas, and add flotation bags if appropriate for the boat. A dry bag also makes gear easier to remove and organize at camp or back at the vehicle.
How to Pack a Kayak for Balance
The goal is simple: keep the kayak trimmed level from bow to stern and keep dense items low and near the center. A bow-heavy boat may plow through the water and resist turning. A stern-heavy boat can wander, catch more wind, and make the front feel light. Either setup can make the boat more tiring to paddle.
Start with heavy gear. Water, food, a compact stove, tools, tackle boxes, and dense camping equipment should go low in the hull and as close to the cockpit as storage access allows. On a touring kayak, split the weight between the front and rear compartments rather than filling one end first. If the stern hatch is larger, it is easy to overload it, so compensate with water or other dense items in the bow.
Lighter items belong farther from the center. Clothing, a sleeping bag, camp pillow, rain layers, and towels can fill empty spaces at the ends of the boat. Use several smaller dry bags instead of one oversized bag. They fit through hatch openings more easily, prevent shifting, and let you fine-tune the load.
After loading, place the kayak in shallow water and sit in it. The bow and stern should float at a similar height. Make small adjustments before launching. A few pounds moved from one compartment to another can noticeably improve tracking and control.
Keep the Deck Clear and Low Profile
Deck bungees are useful, but they are not a general cargo rack. Gear on deck catches wind, blocks your view, interferes with self-rescue, and can become a hazard if the kayak turns over. Keep the deck as clear as possible, especially around the cockpit.
A secured paddle float, bilge pump, spare paddle, and chart or map may belong on deck because they need to be available fast. Everything else should be inside the boat or firmly secured in a low-profile deck bag. Never rely on loose bungees to hold a cooler, folding chair, or large dry bag in rough water.
Build Your Load in Three Access Levels
The most useful packing system separates gear by when you will need it. This prevents you from opening a hatch on the water just to find lip balm or a snack.
Wear It or Keep It on Your Body
Your personal flotation device is essential gear, not cargo. Wear it properly fitted from launch to landing. Store the smallest emergency items in its pockets when possible: whistle, signaling light, small knife or line cutter, sunscreen, snacks, and a waterproof phone case or communication device.
Dress for the water temperature, not only the air temperature. On cool water, a wet suit or dry suit may be the better choice even on a warm day. Add a hat, sunglasses with a retainer, and sun-protective layers for long exposed stretches.
Keep It Within Reach From the Seat
Place frequently used items in a cockpit bag, deck bag, or a small secured bag directly behind the seat. This is the right spot for drinking water, a rain jacket, lunch, fishing pliers, camera, and a compact first-aid kit. Use tethering only where it helps prevent loss, and avoid creating a web of cords that can snag hands or gear.
Hydration deserves special attention. A bottle under bungees or a hydration bladder routed to the cockpit is more useful than a large water container buried in a hatch. For hot-weather paddling, carry more water than you expect to drink. It is also useful weight for balancing the kayak.
Stow It for Camp or Emergencies
Hatches and rear storage areas are for items you will not need until shore or until something goes wrong. This includes spare clothing, sleeping gear, food reserves, stove fuel, repair supplies, and a larger first-aid kit. Group related gear in labeled dry bags so you are not unpacking the kayak to find one headlamp.
For overnight trips, protect your sleep system first. A sleeping bag, insulated pad, and dry base layer are difficult to replace once soaked. Put each in its own waterproof bag rather than trusting one large sack to stay dry for the entire trip.
Use Dry Bags the Right Way
Dry bags work best when they are closed correctly and not overfilled. Leave enough room at the top to make several tight folds before clipping the buckle. A stuffed-to-the-limit bag can leak because the roll-top cannot seal properly.
Choose bag sizes based on the item and the hatch opening. Small bags are ideal for electronics, first aid, and food. Medium bags work well for clothing and sleep systems. Larger bags are useful in open tank wells, but they can be difficult to fit inside a sit-inside kayak.
Waterproof does not mean indestructible. Keep sharp tools, hooks, and stove parts in protective cases so they cannot puncture the bag. For phones, keys, and cameras, use a second waterproof layer. A small dry pouch inside a dry bag adds little weight and provides useful backup.
Pack for Fishing, Day Trips, and Overnights Differently
A short recreational paddle needs less gear than a fishing trip or multi-day route. Packing every possible item creates clutter and reduces stability. Start with the required safety setup, then add only what supports the day’s plan.
For a day paddle, focus on water, weather protection, food, communication, navigation, first aid, and rescue essentials. A small cooler can work on a sit-on-top kayak if it is low, sized for the space, and secured without blocking re-entry. On a sit-inside kayak, soft-sided insulated bags are often easier to pack.
Fishing kayaks can carry more equipment, but tackle should still be controlled. Use compact boxes, secure rods before launching and landing, and keep hooks covered. If you bring an anchor, use a proper quick-release setup and understand local current and wind conditions. An anchor line that cannot be released quickly can create a serious hazard.
For overnight paddles, distribute food and water as they are consumed. The boat’s trim will change during the trip, so repack when needed. Keep the first night’s dinner and next morning’s breakfast accessible instead of burying all food in one compartment.
Do a Final Shoreline Check
Before pushing off, give the kayak a practical inspection. Confirm hatch covers are sealed, dry bag closures are rolled, deck gear is secured, and nothing blocks the cockpit or drains. Check that your paddle, PFD, water, whistle, and communication device are immediately available.
Then consider the conditions, not just the forecast. Wind direction, water temperature, current, motorboat traffic, and the distance to a safe landing all affect what you should carry and where it belongs. A calm morning can become a windy return trip, especially on larger lakes and coastal water.
A packed kayak should feel ready, not crowded. If you cannot reach safety gear, if the deck is stacked high, or if the boat sits noticeably low at one end, take five minutes to reorganize. That small reset can make the paddle safer, more comfortable, and far more enjoyable.
Shop this guide


Compare all 19 kayak & boat accessories →
Free shipping on all orders within the United States.