
How to Sharpen a Pocket Knife Safely at Home
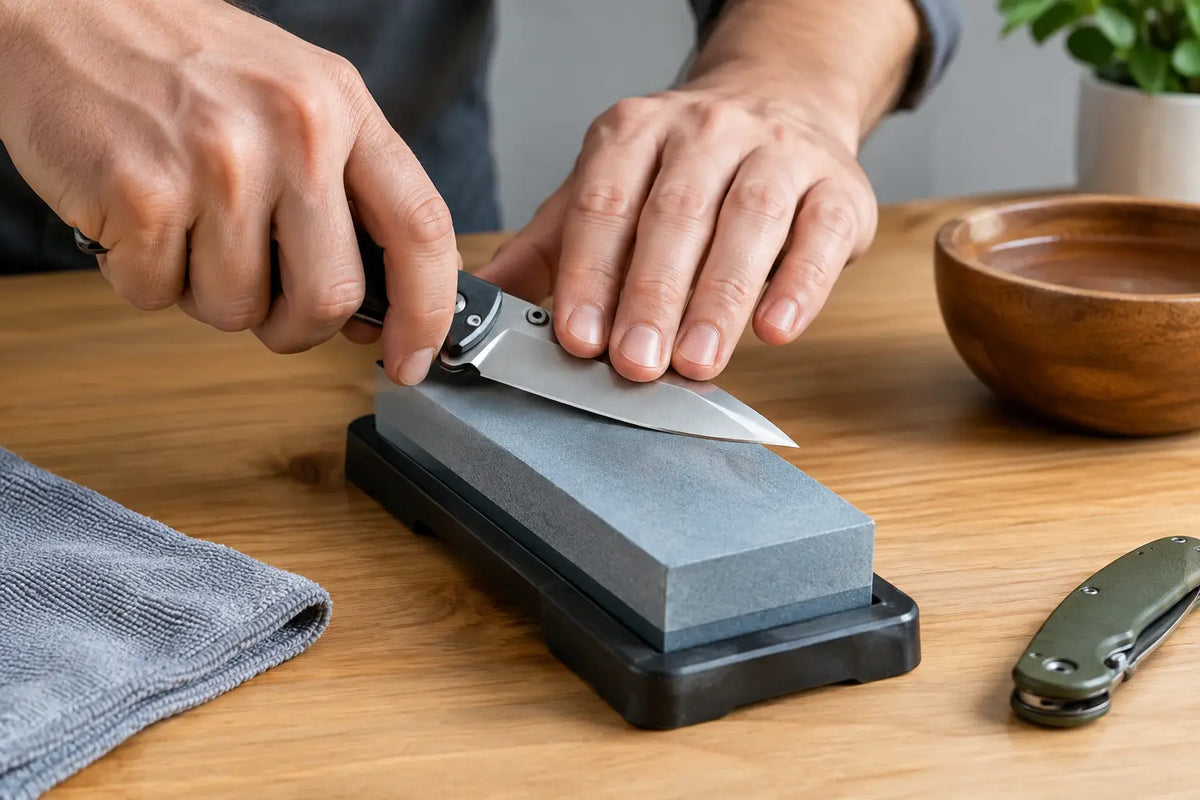
A pocket knife that tears cordage, crushes a tomato, or slips off a piece of kindling is not ready for camp, the tackle box, or daily carry. Learning how to sharpen pocket knife blades gives you a more useful tool and a safer one. A sharp edge cuts with controlled pressure. A dull edge asks you to push harder, which makes slips more likely.
The goal is not to make the blade look polished. The goal is to create two even bevels that meet in a clean, durable edge. You can do that with a basic whetstone, a guided sharpener, or a compact field sharpener. The best method depends on your knife, experience level, and how much metal the blade actually needs to lose.
Start by Checking the Blade
Before choosing a sharpener, clean the blade with warm water and mild soap, then dry it completely. Pocket lint, adhesive, fish residue, and dried food can make the edge feel dull even when the bevel is still in decent shape. Open folding knives fully and make sure the lock is engaged. If your knife has no lock, keep your grip and work surface especially controlled.
Look along the edge in bright light. A sharp edge usually disappears when viewed straight on. If you see shiny spots, those areas are flattened or rolled and need attention. Small chips, a bent tip, or a deeply damaged edge may require a coarse stone or professional service. Do not expect a few passes on a strop to repair visible damage.
Most pocket knives use an edge angle between about 15 and 25 degrees per side. Thin, slicing-oriented blades often perform well around 15 to 18 degrees. A tougher everyday, work, or outdoor knife may benefit from 20 to 25 degrees because the wider angle holds up better against wood, zip ties, and rough camp chores. The trade-off is simple: a thinner edge slices more easily, while a wider edge is generally more durable.
Choose the Right Pocket Knife Sharpener
A sharpening stone is the most flexible choice. It works on nearly any blade shape, lets you control the angle, and can remove enough steel to fix moderate wear. Many stones have a coarse side for reshaping and a fine side for refining. Some use water, some use oil, and diamond plates are typically used dry or with a little water. Follow the stone maker's instructions rather than adding lubricant automatically.
Guided sharpeners are a practical option if holding a consistent angle is your biggest challenge. They clamp or brace the knife and set the abrasive at a repeatable angle. They take up more space than a small stone, but they are especially useful for beginners, people maintaining several knives, and anyone who wants repeatable results without years of practice.
Compact pull-through sharpeners and field sharpeners are convenient for touch-ups, but use them with care. Carbide slots remove metal quickly and can leave a rough, aggressive edge. They are useful when a utility knife needs a fast refresh, but they are not ideal for frequent sharpening of a quality pocket knife. Ceramic rods or slots are gentler for regular maintenance.
A leather strop is not a replacement for sharpening when the edge is truly dull. It is a finishing and maintenance tool. Stropping removes the tiny burr left by sharpening and aligns the finest part of the edge. A few light passes after use can extend the time between full sharpening sessions.
How to Sharpen a Pocket Knife With a Stone
Set the stone on a stable, non-slip surface. A damp towel under the stone works well at home. Place the knife on the stone with the edge facing away from you, then raise the spine until you reach your chosen angle. For a rough reference, 20 degrees is slightly higher than the angle of a matchbook placed under the spine, although knife width changes the exact position.
Start with the coarse grit only if the edge is damaged or very dull. Otherwise, begin with a medium or fine grit. Use light to moderate pressure. Pressing hard does not sharpen faster. It can make the angle inconsistent, gouge the stone, and create a large burr that takes longer to remove.
Move the blade across the stone as though you are trying to slice a very thin layer from its surface. Sweep from the heel near the pivot to the tip so every section contacts the abrasive. Keep your wrist steady and let your shoulder and elbow guide the motion. On a curved belly, slightly lift the handle as you approach the tip so the curve follows the stone.
Work one side until you can feel a faint burr along the full length of the opposite side. The burr is a thin fold of metal that tells you the new bevel has reached the edge. Feel for it carefully by moving a fingertip from the spine toward the edge, never along the edge. Repeat the same number of passes on the other side until the burr switches over.
Then move to a finer stone and repeat with lighter pressure. Alternate sides every one or two strokes as the edge improves. This keeps the bevels balanced and reduces the burr. A blade that looks sharp but has a heavy burr may cut once or twice, then feel dull again when that fragile metal folds away.
Finish the Edge With a Strop
Lay a leather strop flat and pull the knife away from the edge, spine leading. This is the opposite direction of a slicing stroke. Keep the same sharpening angle or slightly lower it. Use very light pressure, because pushing too hard can round over the edge you just created.
Make five to ten passes per side, alternating as you go. If you use stropping compound, a small amount is enough. The leather itself also works for light maintenance. Avoid stropping on a hanging belt unless you already have good angle control. A flat strop is easier to manage and safer around a folding knife.
Test the Edge Without Taking Risks
Do not test sharpness by running your thumb along the edge. Instead, lightly touch the edge perpendicular to the blade with a clean fingertip. A sharp edge feels like it wants to catch your skin; a dull edge feels smooth and rounded.
Paper is another useful test. Hold a sheet of printer paper by one corner and make a controlled slice. A properly sharpened knife should cut cleanly without snagging. For an outdoor knife, slicing a piece of cardboard or paracord can be a more realistic durability check. If the knife cuts paper but struggles with cordage, the edge may be too polished, too thick, or still carrying a burr.
Avoid testing on hard materials such as staples, glass, rocks, ceramic plates, or nails. Those tests damage the edge and tell you little about how the knife will perform on food, line, tape, packaging, or wood shavings.
Common Sharpening Mistakes to Avoid
The most common mistake is changing the angle during each stroke. Consistency matters more than chasing a specific number of degrees. Pick an angle that suits the knife's job and repeat it as closely as possible on both sides.
Another mistake is over-sharpening. If your knife still slices well but feels less refined, use a fine ceramic sharpener or strop first. Repeatedly starting with a coarse abrasive shortens blade life and can change the original blade profile.
Be cautious with coated blades. Most black, stonewashed, or corrosion-resistant coatings are cosmetic or protective on the blade flats, but sharpening removes material at the bevel. That is normal. Focus the abrasive on the edge rather than rubbing the sides of the blade unnecessarily.
Finally, do not forget folding-knife maintenance. Wipe away sharpening debris, add a small amount of appropriate pivot lubricant if needed, and check the screws for loosening. Keep the knife dry before returning it to a pocket, pack, tackle bag, or glove compartment.
Keep the Edge Ready for Real Use
How often you sharpen depends on the steel, edge angle, and work the knife does. A knife used to open packages may need only occasional stropping. A knife used around camp for food prep, cordage, feather sticks, and gear repairs will need more frequent touch-ups. Saltwater fishing, humidity, and wet outings also call for prompt cleaning and drying to prevent corrosion near the edge.
Build a simple routine: clean the knife after use, strop it when it starts losing bite, and use a fine stone before it becomes frustratingly dull. Save coarse sharpening for chips, rolled edges, and genuine dullness. That approach protects your blade, takes less time, and keeps a dependable tool ready when the next task cannot wait.