
Kayak Fishing Setup Example for Safer Water Days
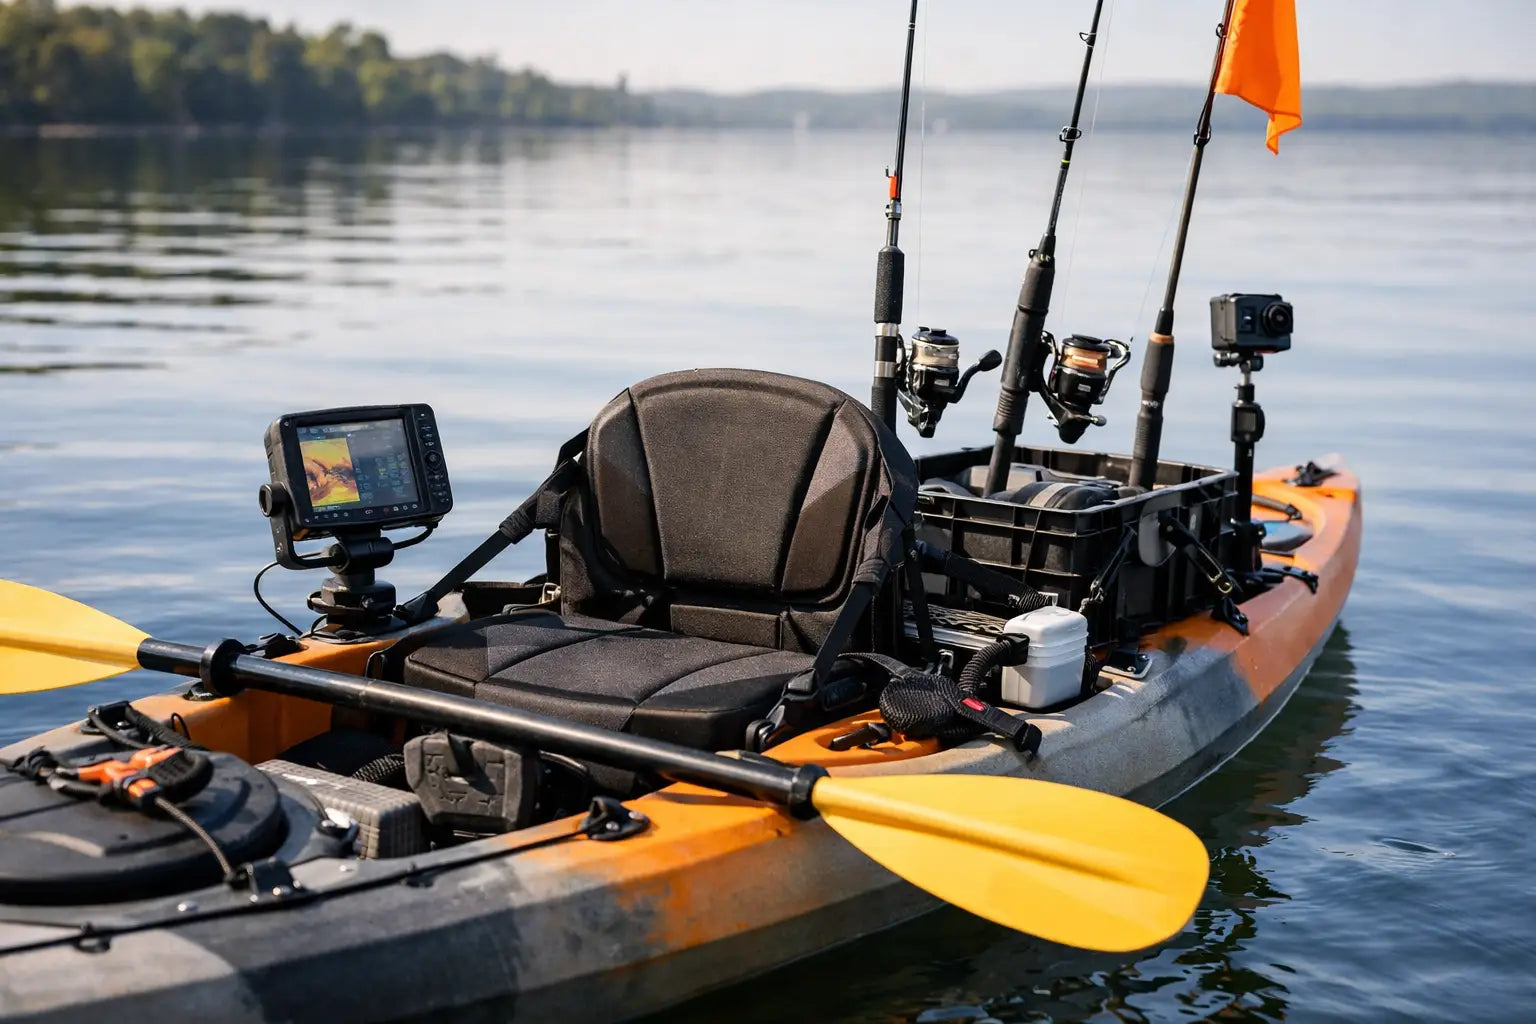
A loose tackle box sliding across the deck when a fish hits is more than an annoyance - it can turn a good bite into a bad recovery. This kayak fishing setup example starts with the gear that keeps you balanced, organized, and ready to fish without cluttering the cockpit.
The right setup is not the one with the most accessories. It is the one that fits your water, your target species, your launch routine, and your ability to reach every essential item while seated. A calm neighborhood pond calls for a different rig than a tidal creek, large reservoir, or exposed coastal flat.
Start With a Stable Fishing Platform
A fishing-specific sit-on-top kayak is the easiest foundation for most anglers. Its open deck makes it simpler to enter, exit, manage wet gear, and recover from an unexpected splash. Wider hulls generally feel more stable when you cast, turn to grab a rod, or land a fish beside the boat. The trade-off is speed. A wide, heavily loaded kayak takes more effort to paddle over long distances.
Choose capacity with your fully loaded trip in mind, not just your body weight. Include yourself, a PFD, rods, tackle, water, cooler, anchor, battery, fish finder, and any catch you plan to bring home. A boat that is near its maximum capacity can sit lower in the water and feel less responsive.
Seat comfort matters because fishing often means staying put for hours. An adjustable elevated seat improves casting position and keeps you farther above pooled water. It also raises your center of gravity, so new paddlers should practice turning and reaching in calm water before loading every accessory onto the kayak.
A Kayak Fishing Setup Example for Freshwater Trips
Picture a half-day trip for bass, crappie, or panfish on a small lake. The kayak carries three rods: a medium spinning rod for soft plastics, a medium-heavy casting rod for jigs or moving baits, and a lighter spinning rod for finesse presentations. Two rods rest in rear-facing holders while the rod in use stays in hand or across the lap while drifting.
A compact tackle crate sits behind the seat in the rear tank well. It holds a few utility boxes vertically, so labels remain visible and a single box can be removed without digging through the whole crate. Use a bungee or strap system to secure it. Gear that is merely placed in the tank well can disappear quickly if the kayak tips or a wake comes over the stern.
In front of the seat, keep only the tackle needed for the next hour or two: one small box, pliers, line cutters, and a landing net. A small deck bag or seat-side pouch works well for this job. The goal is simple: frequent-use tools should be reachable with one hand, while reserve gear stays stored and secured.
A 10- to 20-liter dry bag behind the seat protects a phone, wallet, extra shirt, rain layer, keys, and basic first-aid supplies. Even a kayak with sealed hatches can take on water through an open lid, a loose gasket, or a flip during loading. Pack critical items inside a waterproof case or dry bag rather than trusting one storage compartment alone.
Rig the Cockpit for Reach, Not for Show
Every accessory should earn its deck space. Before drilling holes or adding track mounts, sit in the kayak on dry land and test the reach to your rod holders, paddle holder, crate, electronics, and net. Then repeat the test on calm water. A mount that seems convenient in a garage may force an awkward twist once you are wearing a PFD and moving with the current.
Place a paddle leash or paddle holder where it can be used quickly. A dropped paddle can leave you drifting away from a shoreline, structure, or your launch point while both hands are busy fighting a fish. Many anglers also use rod leashes in current, surf, or deep water. They add a little management during casting, but replacing a rod and reel after one overboard moment costs far more.
Keep the landing net secured but easy to pull free. Folding nets save space, while longer-handled models make it easier to land fish without leaning too far over the side. For larger fish or barbless-hook fishing, the extra reach can be worth the storage trade-off.
Add Electronics and Power Carefully
A compact fish finder can help identify depth changes, channel edges, bait, and submerged cover. For lake fishing, mount the display where you can see it without blocking your casting stroke or access to the cockpit. Run wiring cleanly and protect connection points from spray, sand, and snagging hooks.
A small sealed battery in a dedicated battery box is a practical power source for many kayak electronics. Position it low and near the kayak's centerline when possible. That keeps weight balanced and reduces the effect of side-to-side movement. Check the kayak manufacturer's guidance before mounting a transducer, drilling through the hull, or choosing battery size.
Electronics help you fish with more information, but they do not replace observation. Wind direction, changing clouds, water temperature, shoreline access, and boat traffic still shape whether a spot is safe and productive. If you are new to kayak fishing, learn the boat and the water first, then add a fish finder once your basic routine feels automatic.
Build Safety Into the Setup
Fishing gear should never crowd out safety equipment. Wear a properly fitted, U.S. Coast Guard-approved personal flotation device at all times, preferably a paddling or fishing model that allows comfortable shoulder movement. Keep a whistle attached to the PFD, not buried in a crate. A bright light is useful for low-light launches, late returns, and signaling.
Your basic safety loadout should include these essentials:
- A paddle leash or secure paddle holder
- A whistle and visible light attached to your PFD
- A phone in a waterproof case or dry pouch
- Drinking water, sunscreen, and weather-appropriate layers
- A small first-aid kit and basic repair supplies
Check local rules for required safety equipment, registration, lighting, and fishing licenses before launching. Conditions can change quickly, especially around afternoon storms, dam releases, tide shifts, and powerboat traffic. A short trip close to shore is the right place to test new gear.
Load for the Water You Actually Fish
The biggest setup mistake is treating every trip like an expedition. For a small pond, a paddle, PFD, two rods, compact tackle bag, water, and phone protection may be all you need. Less weight improves handling and makes launch and loading faster.
For a full day on a large lake, add hydration, food, sun protection, an extra layer, backup terminal tackle, a battery-powered fish finder, and a cooler or insulated bag. Keep heavy items low and as close to the center of the kayak as possible. If the bow rides high or the stern drags, redistribute weight before paddling far from the ramp.
Saltwater and brackish water require more cleanup discipline. Rinse rods, reels, mounts, anchor hardware, and electronics after each outing. Corrosion can start in small fasteners and connectors long before it becomes obvious. Storing your kayak, fishing equipment, and dry gear in an organized home space makes the next launch easier and extends the life of the equipment.
Adventure Cove Store makes it easier to build a practical water-day kit with kayak accessories, fishing tackle, dry storage, lighting, and outdoor essentials selected around real use.
Test Your Rig Before the Fishing Gets Serious
Take a first outing with fewer rods and less tackle than you think you need. Practice paddling, stopping, turning, accessing the crate, stowing the paddle, reaching the net, and getting back into the kayak in shallow, calm water. If you cannot reach an item comfortably while seated, change its location before relying on it farther from shore.
A productive kayak is not defined by a crowded deck or expensive electronics. Build around stable seating, secure storage, accessible tools, and equipment that matches your local water. When every item has a purpose and a place, you can spend less time managing gear and more time watching the line.
Shop this guide


Compare all 18 kayak fishing →
Free shipping on all orders within the United States.