How to Choose a Waterproof Dry Bag for Kayaking
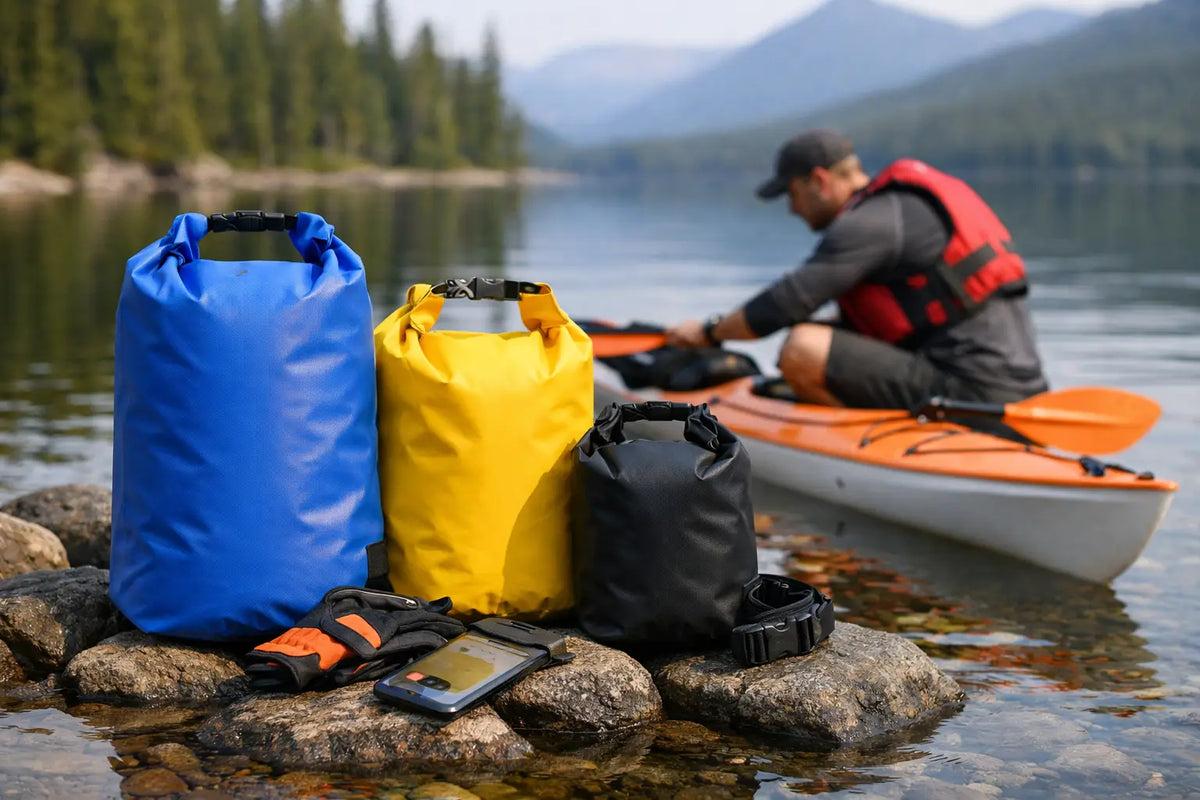
A phone, dry layer, and lunch can turn a simple paddle into a problem if they are packed in the wrong place. A waterproof dry bag for kayaking keeps the gear you need protected from paddle drip, rain, wet launches, and the occasional capsize. The best choice is not always the biggest bag. It is the one that fits your trip, seals reliably, and stays easy to reach from the seat.
What “waterproof” should mean on a kayak
Most kayaking dry bags use a roll-top closure. You load the bag, press out extra air, fold the top down at least three times, then clip the buckles together. When the closure is rolled correctly and the seams are welded or taped, this design handles splashes, rain, and brief immersion very well.
That does not mean every dry bag should be treated as a waterproof vault. A loosely rolled top, a bag packed so full that it cannot fold, or a worn buckle can let water in. If you are carrying a phone, camera, medications, or car keys, place those items inside a second waterproof pouch or hard case before putting them in the dry bag. This small backup step is especially worthwhile on open water and moving rivers.
Water-resistant backpacks and deck bags serve a different purpose. They are convenient for quick-access snacks or a map, but they may not keep contents dry after a flip. For gear you cannot afford to soak, choose a true roll-top dry bag with sealed seams.
Choose a waterproof dry bag for kayaking by capacity
Capacity is measured in liters, and a bag that is too large can be as inconvenient as one that is too small. Oversized bags take up cockpit room, encourage overpacking, and are harder to secure. Think about what needs protection during this specific outing, not every item you own.
- 5 to 10 liters: A compact choice for keys, wallet, phone, sunscreen, a compact first-aid kit, and a light layer. It works well for short recreational paddles where larger supplies stay in the car.
- 15 to 20 liters: A practical day-trip size for food, a towel, rain gear, extra clothes, and small electronics. Many casual paddlers can cover most lake, river, and coastal day outings with one bag in this range.
- 30 liters: Useful for fishing gear, a full change of clothes, warmer layers, larger lunch kits, or family supplies. It is a strong option for touring kayaks with storage space or tandem trips.
- 40 liters and up: Best for overnight paddles, canoe camping, or bulky sleeping and shelter gear. These bags are useful, but they should be packed carefully so weight stays low and balanced.
Match the shape to your storage space
Tall, narrow dry bags slide easily into the bow or stern compartments of many sit-inside kayaks. Wider bags can be better for a sit-on-top kayak, a canoe, or a larger deck area, but they may catch wind and interfere with your paddle stroke if placed carelessly.
Before buying, measure the hatch opening rather than guessing from the size of the compartment. A 20-liter bag may have plenty of volume but still be too wide to pass through a small oval hatch. Flexible dry bags can be gently shaped as you pack them, which is one advantage over rigid storage boxes.
Material and construction affect real-world durability
For occasional calm-water use, a lightweight nylon dry bag can be easy to carry and store. For frequent launches on gravel, fishing trips with hooks and tools, or rougher conditions, look for thicker coated fabric and reinforced contact points. The trade-off is simple: heavier material generally provides more abrasion resistance, while lighter material saves weight and packs down smaller.
TPU-coated fabrics are often flexible and less stiff in cold weather. PVC-coated options can be highly durable and economical, though they may feel bulkier and become less pliable in low temperatures. Either can work well when the seams are properly welded and the closure is well made.
Check the details that get used most: buckles, roll-top stiffener, carry handle, shoulder strap anchors, and D-rings. A removable shoulder strap is helpful when carrying gear from the parking area to the launch, but it should not be your only method for securing a bag on the water. A bag with multiple attachment points gives you more options for stable storage.
Pack and seal the bag correctly
Even a quality dry bag needs correct packing. Start by grouping gear according to how soon you will need it. Put spare clothes and camp gear low in the bag. Keep a rain shell, snacks, and a small first-aid kit nearer the top if they may be needed during the paddle.
Follow this sequence each time:
1. Put sensitive gear in a secondary pouch or case.
2. Keep sharp tools, fishing hooks, and knife edges in protective covers so they do not puncture the fabric.
3. Remove excess air without crushing delicate items.
4. Align the top edges and roll the closure down at least three times.
5. Clip the buckles, then check that the rolled section is even from side to side.
Do not use the bag as a flotation device or rely on trapped air to replace a personal flotation device. A properly fitted PFD is essential, and a dry bag should support your organization, not your safety plan.
Secure it without creating a snag hazard
Where you place the bag depends on your kayak. In a sit-inside model, heavier bags usually belong inside bow or stern storage areas, packed so they cannot shift. On a sit-on-top kayak, a dry bag can ride behind the seat or under bungee rigging if it is low, balanced, and clear of the paddle path.
Use deck bungees, tie-down straps, or attachment points made for kayak storage. Avoid long loose cords that can snag your hands, rod, or paddle. A short tether can prevent a bag from floating away during a capsize, but it should be easy to release and should never be attached in a way that could trap you underwater.
For fishing kayaks, separate frequently used tackle from your dry storage. Your dry bag is the right place for spare clothing, a rain jacket, electronics, and food. A water-resistant crate or tackle box is often more practical for lures and tools that need constant access.
Build a setup for the trip you are taking
A casual afternoon on a local lake may only require a 10-liter bag with a phone pouch, light jacket, water, and keys. A longer paddle in changeable weather calls for more capacity, plus dry socks, an insulating layer, food, and a compact emergency kit.
For an overnight route, consider using several smaller bags instead of one oversized bag. Keep sleep gear in one, clothing in another, and cooking supplies in a third. This makes weight distribution easier and prevents you from unpacking everything just to find one item. It also gives your gear some protection if one bag is damaged.
Adventure Cove Store shoppers who combine kayaking with camping or fishing can benefit from this modular approach. The same dry bag system can move from kayak storage to a campsite, then pack away neatly at home until the next water day.
Rinse, inspect, and store your dry bag dry
After saltwater, muddy river, or sandy beach use, rinse the outside and closure with fresh water. Grit caught in the roll-top fold can wear the coating and make the seal less dependable over time. Let the bag air-dry fully before storing it, especially if it held damp clothes or food.
Inspect the seams and buckles before each trip. Small abrasions can often be patched before they become a leak, while damaged buckles should be replaced promptly. Store the bag loosely rolled or laid flat in a cool, dry place rather than tightly compressed for months.
The right dry bag gives you one less thing to worry about once the kayak leaves shore. Pack only what you need, seal it with care, and keep your essential gear protected so your attention can stay on the water ahead.
Shop this guide


Compare all 13 sleeping bags & camp beds →
Free shipping on all orders within the United States.